
Veneer, Explained: From Log to Cabinet
How fine wood veneer is sourced, sliced, matched, and applied, and why it gives designers a grain you cannot get any other way.
Mention veneer and many homeowners still picture the peeling, plastic-looking surfaces of cheap 1970s furniture. That reputation is badly out of date. In high-end custom work, veneer is not a shortcut or a substitute for solid wood. It is the only way to wrap a continuous, book-matched figure across a wall of cabinetry, to use rare and unstable species that could never survive as solid lumber, and to build large panels that stay flat for decades. For the designers and architects we work with across Missouri, understanding how veneer is made is the difference between specifying it with confidence and leaving its single most important quality, the grain, to chance.
This is the story of how a log becomes a finished cabinet face, and what to look for at each step.
Where veneer comes from
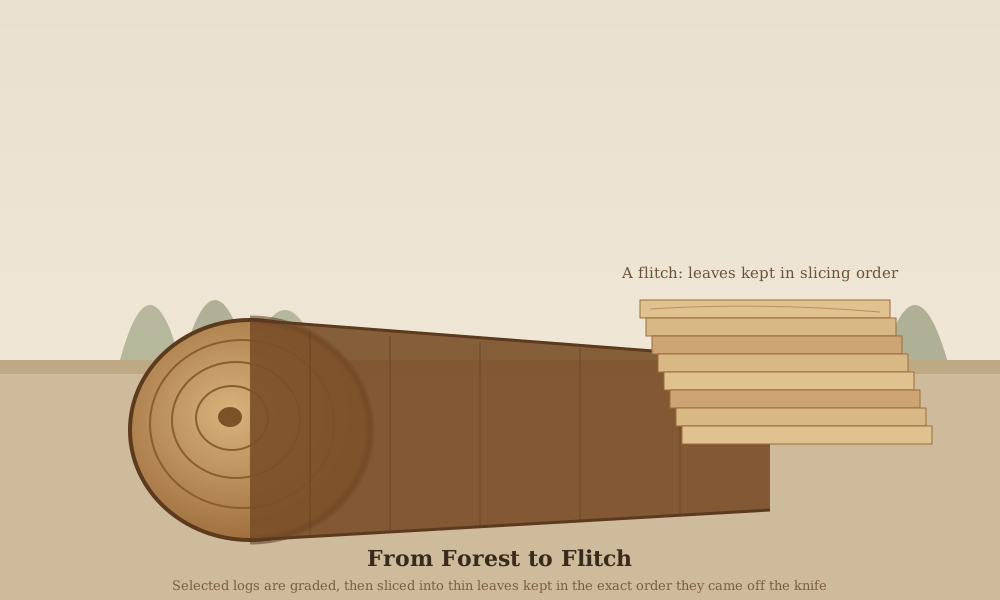
Fine veneer begins with the log, and not just any log. Veneer mills buy selectively, paying a premium for straight, clear, large-diameter logs with the color and figure that decorative work demands. A single exceptional walnut or oak log can be worth many times its value as ordinary lumber precisely because it will be sliced, not sawn, and every leaf will be sold for its appearance.
Once a log is chosen, it is cut into sections and often squared into a flitch, the block that will actually be sliced. The critical idea to understand here is sequence. As the log is sliced, every paper-thin leaf is kept in the exact order it came off the knife and stored together as a flitch bundle. Because consecutive leaves are nearly identical mirror images of one another, keeping them in order is what later allows a cabinetmaker to match grain seamlessly across a door, a drawer bank, or an entire room. Lose the sequence and you lose the match.
This is also why veneer lets designers use woods that are effectively impossible in solid form. Burls, crotches, and many exotic species are too small, too rare, or too prone to splitting to be milled into stable boards. As a thin leaf bonded to a stable core, that same wild figure becomes both usable and durable.
How the log is cut: four methods, four very different faces
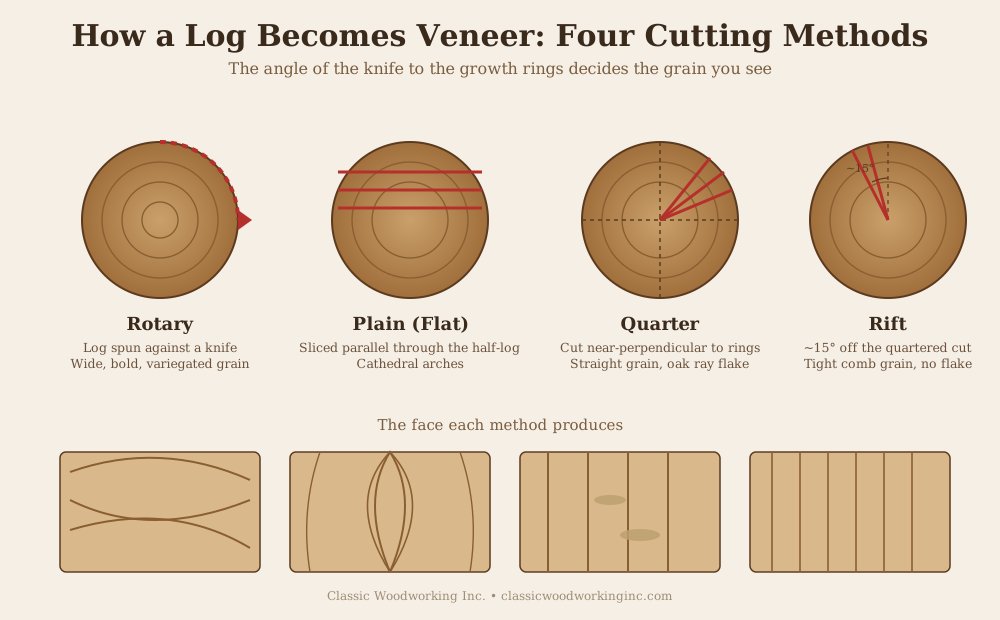
The single biggest factor in how a veneer looks is the angle at which the knife meets the growth rings. There are several cutting methods, and four account for nearly everything a designer will specify.
Rotary cutting mounts the whole log in a giant lathe and spins it against a stationary knife, peeling a continuous sheet the way you unroll paper towel. It is the most economical method and can produce very wide sheets, but it yields a bold, wandering, variegated grain that reads as plywood to most eyes. It is common in construction-grade panels and less common in fine cabinetry.
Plain slicing, also called flat cutting, is the most popular decorative method. The flitch is sliced straight through, parallel to a line down its center, so the knife crosses the growth rings at a shifting angle. The result is the familiar cathedral pattern, those nested arches or pointed flame shapes at the center of each leaf, framed by straighter grain toward the edges. It offers the best balance of yield, cost, and classic appearance.
Quarter slicing cuts roughly perpendicular to the growth rings, producing a straight, vertical, ribbon-like grain. In white oak this method also reveals the dramatic flake or fleck figure, created when the knife bisects the tree’s radial medullary rays. Designers either love that flake or specifically avoid it, which is exactly why the fourth method exists.
Rift cutting takes the leaf at roughly fifteen degrees off the true quartered angle. That small shift keeps the tight, straight comb grain of quarter sawing while avoiding the ray flake. Rift white oak, with its quiet linear grain and almost no flake, has become one of the most requested looks in contemporary interiors, and it is the reason a calm, vertical paneled wall reads as so consistent.
Slicing, drying, and clipping
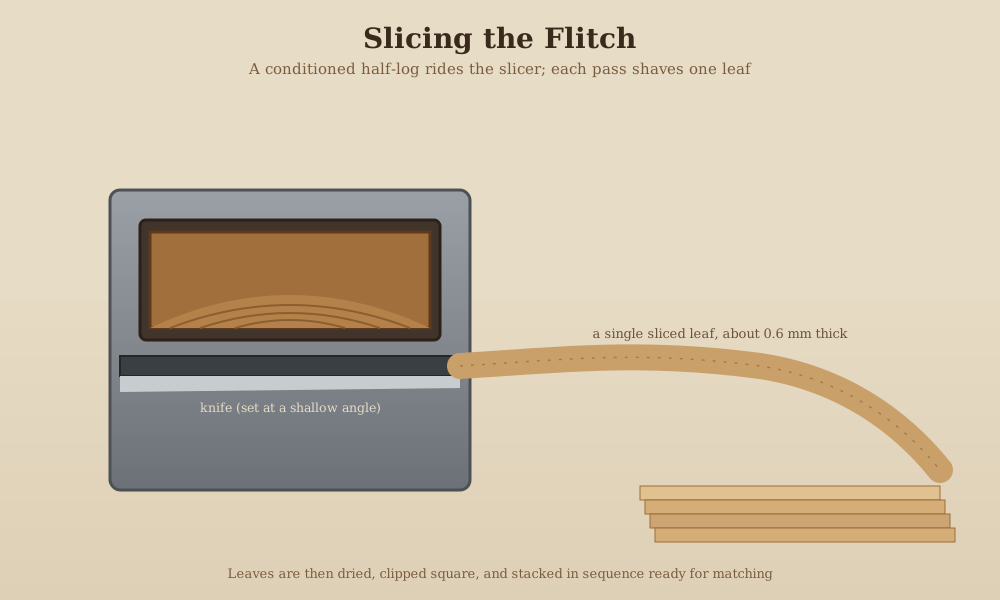
Wood does not slice cleanly when it is cold and dry, so before any cutting begins the flitch is conditioned. Mills soak or steam the wood for a controlled period, often a day or more at carefully managed temperatures, to soften the lignin that binds the fibers together. Get it right and the knife shears off a smooth, flexible leaf. Steam too long and the wood darkens; too little and it splinters and cracks. The recipe changes by species, which is part of the craft of a good mill.
The conditioned flitch then rides the slicer, and with each pass the knife shaves off a single leaf. Decorative veneer is remarkably thin, typically around one fortieth of an inch, roughly 0.6 millimeters, though it ranges from about 0.4 to 1 millimeter depending on the mill and the use. Each fresh leaf is dried to a stable moisture content, clipped square to remove ragged edges, and restacked in slicing order. What leaves the mill is not loose sheets but organized flitches, ready to be matched.
Matching: where grain becomes design
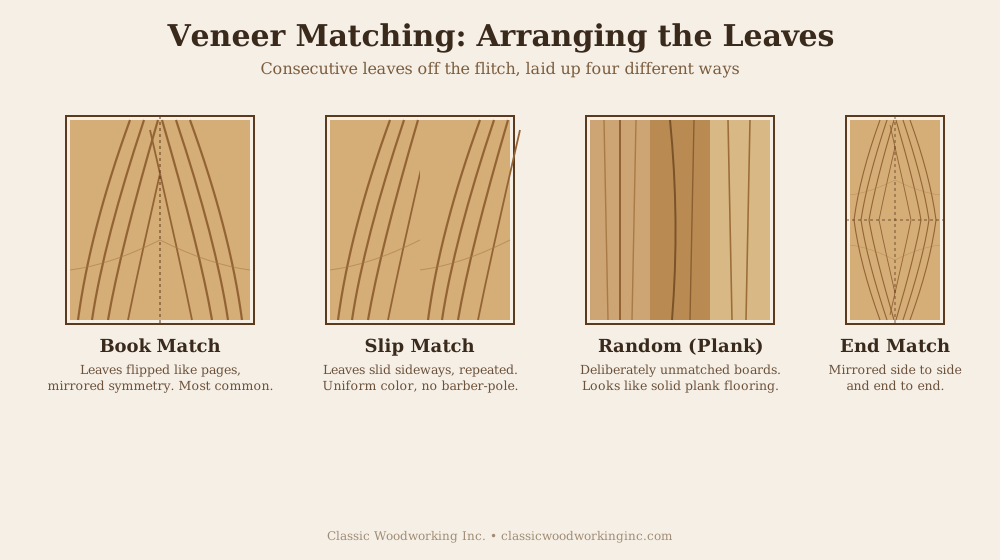
Matching is the step where individual leaves become a composed surface, and it is where a designer’s intent matters most. The same flitch can be laid up several ways to produce completely different results.
Book matching is the most common and the most striking. Every other leaf is flipped over like turning the page of a book, so adjacent leaves become mirror images and the grain forms a symmetrical pattern down the joint. The effect is beautiful, but there is a real tradeoff worth knowing: because alternating leaves present their tight and loose faces, they can reflect light and absorb stain slightly differently, sometimes producing a faint light-and-dark striping called the barber pole effect. A good finisher anticipates it.
Slip matching avoids that problem. Instead of flipping leaves, each one is slid sideways and laid up the same way around, so the grain pattern repeats across the panel and the color stays uniform. It is a frequent choice for quarter and rift cuts where the grain is already straight.
Random or plank matching deliberately mixes leaves of differing color and grain, board by board, to imitate the look of a floor of individual solid planks. It reads as casual and natural and is an efficient way to use flitches with shorter or less consistent leaves.
End matching extends a pattern in both directions, mirroring leaves side to side and also end to end, which is how a continuous figure can be carried up a tall door or across a long run without an obvious break. Choosing the match is not a finishing detail handed off at the end. It is a design decision that should be made with the cabinetmaker while the flitch is still intact.
Qualities and variations to specify
Beyond the cut and the match, veneer carries a vocabulary of figure, the natural three-dimensional patterns that catch light. Burl, the densely clustered eyes that form from a wart-like growth on the tree, is among the most prized and the most expensive. Crotch figure, taken from the fork where the trunk meets a major limb, produces dramatic flame and feather patterns. Quilted, fiddleback, and bird’s eye, most familiar in maple, each describe a distinct shimmering or rolling figure that no flat-grained board can imitate. These are the looks that justify veneer on their own.
There is also a meaningful distinction between natural veneer, sliced directly from a real log exactly as described here, and reconstituted veneer, which is engineered by dyeing fast-growing wood, laminating it into blocks, and re-slicing it into uniform, repeatable patterns. Reconstituted material offers consistency and availability, while natural veneer offers the genuine, one-of-a-kind character of the tree it came from. For most of the high-end residential and commercial interiors we serve, natural veneer is the point. Finally, veneer comes in different backings and grades, from raw unbacked leaves to paper- or phenolic-backed sheets, and choosing among them depends on the substrate, the curvature of the surface, and how the panel will be handled.
How veneer is applied to cabinetry
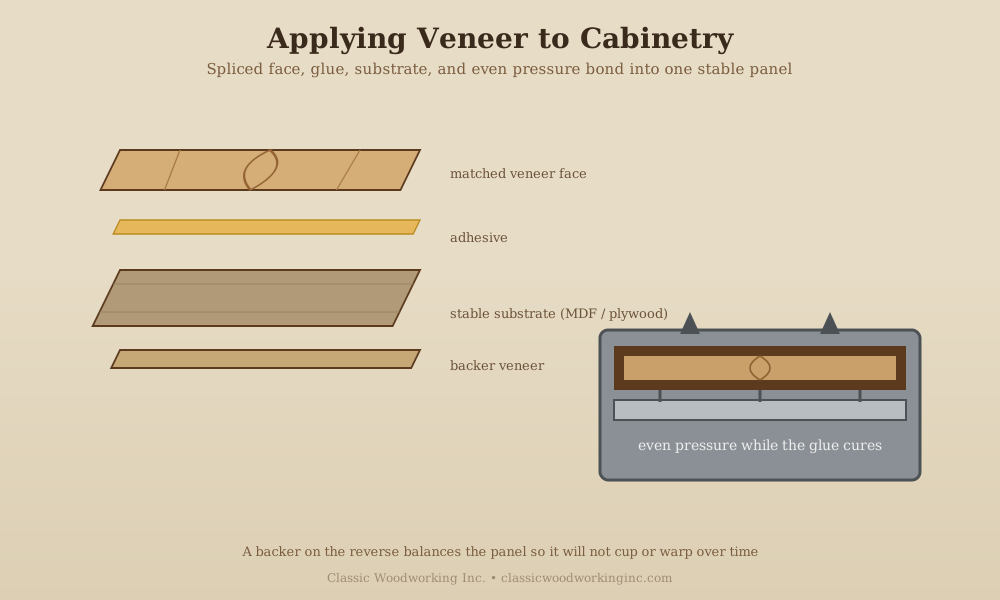
A matched face is only as good as the panel beneath it. In the shop, the laid-up veneer face is bonded with adhesive to a stable substrate, usually a high-quality plywood or medium-density fiberboard chosen because it will not move with humidity the way solid wood does. The assembly is then pressed, either in a heated platen press or under vacuum, so that even pressure holds the entire surface in full contact with the glue line while it cures. Uneven pressure or a void in the glue is what causes the bubbles and lifting that gave old veneer its bad name, and it is exactly what controlled pressing prevents.
One detail separates lasting work from work that fails: the backer. A veneer face exerts tension as its glue dries, and a panel skinned on only one side will eventually cup or warp toward the veneered face. The fix is to apply a balancing backer veneer to the reverse, so the two faces pull against each other and the panel stays dead flat. It is invisible in the finished cabinet and absolutely essential. From there the panel is trimmed, edged, sanded, and finished, and the grain that started as a single log arrives as a continuous, stable, furniture-grade surface.
Why it matters for specifiers
Veneer is not the compromise it is often assumed to be. It is how a designer gets a figure that does not exist in solid lumber, a grain that flows unbroken across an entire elevation, and a panel engineered to stay flat for the life of the room. The decisions that determine all of that, the species, the cut, the match, and the backing, are made early, with the flitch in hand, not chosen from a chip sample after the cabinets are built. The earlier a millwork partner is part of that conversation, the more control a designer keeps over the most visible material in the room.